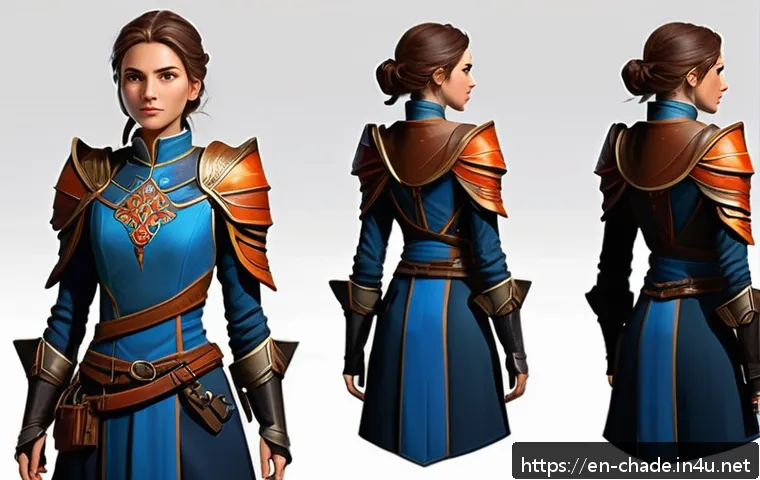
Preparing for a character design practical exam can feel overwhelming, especially when creativity meets technical skills under time pressure. From mastering anatomy to expressing unique personalities through visuals, the challenge lies in balancing imagination with precision.

Having faced similar tests, I know how crucial it is to develop a workflow that fuels both efficiency and originality. Whether you’re sketching on paper or working digitally, understanding key principles will boost your confidence and performance.
Let’s dive into the essential tips and strategies that can turn your preparation into success. I’ll guide you through everything you need to know in detail!
Building a Strong Foundation in Anatomy
Understanding Proportions and Silhouettes
Getting anatomy right is the backbone of any character design, especially under exam conditions where time is tight. I’ve found that focusing on basic human proportions first really cuts down on wasted time fixing mistakes later.
For example, knowing that an average adult figure is about seven and a half heads tall gives you a quick reference point to keep your sketches believable.
Silhouettes are equally important because they communicate the character’s personality before any detail is added. When practicing, try blocking out your characters with simple shapes to capture a unique and readable silhouette.
This step not only speeds up your workflow but also ensures your design stands out, which is often a key grading criterion.
Mastering Gesture Drawing for Dynamic Poses
Gesture drawing is my go-to warm-up and an essential skill for exams that require quick, expressive sketches. It’s less about perfect lines and more about capturing the energy and flow of the pose.
When you nail the gesture, your character feels alive and believable, even in rough drafts. During my exams, I made it a habit to spend the first few minutes on loose gesture sketches before refining details.
This approach helped me avoid stiff, unnatural poses and gave my characters a natural rhythm, which judges always notice. Remember, a dynamic pose can speak volumes about a character’s mood or background without needing extra explanation.
Balancing Realism and Stylization
One of the trickiest parts of character design exams is deciding how much to stylize versus how much anatomical accuracy to maintain. I’ve learned that leaning too far into either extreme can cost points.
The sweet spot is capturing the essence of the character while keeping anatomy believable enough that viewers don’t get distracted. For instance, exaggerating features like larger eyes or elongated limbs can add personality, but they should still follow underlying anatomical logic.
Practicing with different levels of stylization beforehand helps you adapt quickly during the test. This flexibility can be a game changer when the character brief is vague or open to interpretation.
Crafting Memorable Character Personalities
Using Visual Cues to Convey Traits
Character design isn’t just about how someone looks; it’s about telling a story through visuals. I always focus on small details that hint at a character’s personality or backstory.
Things like posture, clothing, and accessories can communicate whether someone is confident, shy, rebellious, or gentle. For example, a slouched posture paired with oversized clothes might suggest insecurity or introversion.
During my exam practice, I experimented with different visual elements until I found combinations that felt natural and expressive. This not only makes your design richer but also helps you stand out by showing depth beyond the surface.
Color Choices and Their Emotional Impact
Colors are incredibly powerful for evoking mood and personality. I noticed that when I deliberately planned my color palette to match the character’s traits, my designs felt more cohesive and intentional.
Warm colors like reds and oranges can convey energy or aggression, while cool blues and greens often suggest calmness or mystery. It’s important to avoid random color choices that clash or confuse the viewer.
In exams, a well-thought-out palette can be the difference between a forgettable design and one that sticks in the examiner’s mind. Playing with limited palettes during practice helped me develop a faster decision-making process during timed tests.
Expressing Emotion Through Facial Expressions
Facial expressions are the heart of character connection. Even if your exam focuses on full-body poses, including a strong, readable expression can elevate your design.
I practiced sketching different emotions—anger, joy, sadness, surprise—so I could quickly switch between them depending on the character brief. Sometimes, subtle changes like eyebrow positioning or mouth shape make all the difference in conveying complexity.
When I nailed this skill, I noticed that my characters felt more relatable and believable, which often translated to higher scores. Don’t underestimate the power of a well-executed expression in a timed setting.
Efficient Workflow Techniques for Exam Success
Planning Before You Draw
Jumping straight into detailed sketches can be tempting, but I learned the hard way that a quick plan saves time and stress. Before putting pencil to paper or stylus to tablet, I spend a few minutes brainstorming key elements: pose, silhouette, and main features.
This mental map guides my drawing, preventing unnecessary revisions. In exams, this habit helped me stay focused and avoid panicking when the clock was ticking.
I recommend practicing this planning step so it becomes second nature, enabling you to work smarter, not harder.
Layering and Iterative Refinement
For digital artists, layering is a lifesaver during timed tests. I create rough sketches on one layer, blocking out shapes and forms, then gradually add details on separate layers.
This method lets me adjust proportions or poses without ruining the entire drawing. Even on paper, using tracing paper or light sketching pencils can mimic this process.
Iterative refinement—building up the design step-by-step—keeps your work clean and professional, which examiners appreciate. It also boosts your confidence because you’re always working from a solid base rather than guessing as you go.
Time Management Strategies
Managing your time effectively is just as important as drawing skills. I used to get so absorbed in details that I ran out of time for finishing touches.
To avoid this, I break the exam time into chunks: initial sketching, refining, adding details, and final polish. Setting mini-deadlines in your mind keeps you on track and prevents burnout.
If you get stuck on a tricky part, move on and come back later if time permits. This approach ensures you complete every section of the task, which is crucial for comprehensive grading.
Mastering Visual Storytelling Elements
Incorporating Props and Environment
Adding props or hints of environment can instantly deepen a character’s story. I’ve noticed that even a simple object like a weapon, a bag, or a pet can reveal so much about a character’s lifestyle and personality.
During practice, I challenge myself to include at least one prop that complements the character’s role or background. This extra layer of detail makes your design richer and shows examiners you’re thinking beyond just anatomy and color.
Just be careful not to overdo it—props should support the design, not distract from it.
Using Line Weight and Texture for Depth
Line weight and texture can dramatically influence how your character reads. Thicker lines can emphasize strength or importance, while thinner lines suggest delicacy or distance.

Textures, whether in hair, clothing, or skin, add realism and tactile interest. I experimented with different brushes and techniques to find what worked best for various character types.
This practice paid off in exams by giving my drawings a polished, professional look that felt dynamic rather than flat. Understanding how to control these elements is a subtle but powerful skill.
Balancing Detail and Simplicity
It’s easy to get carried away adding details, especially when you want to impress. However, I learned that too much detail can overwhelm the viewer and slow you down during timed work.
Striking a balance between essential details and clean design is key. Focus on the features that best tell the character’s story and skip anything extraneous.
This minimalist approach keeps your design readable and impactful, especially at a glance. Practicing this balance beforehand helps you make quicker, smarter decisions during the exam.
Adapting to Different Mediums and Tools
Optimizing Digital Tools for Speed
If you’re working digitally, mastering shortcuts and custom brushes is a huge time saver. I set up my workspace with frequently used tools easily accessible so I don’t waste precious minutes hunting through menus.
Using layers effectively, as mentioned earlier, allows quick edits without starting over. I also recommend familiarizing yourself with blending modes and opacity settings to add depth without extra effort.
Having this technical fluency frees up mental space to focus on creativity, which really pays off during exams.
Making the Most of Traditional Materials
For those using traditional media, having the right materials at hand can make or break your exam performance. I always bring pencils with varying hardness, a quality eraser, and a reliable sharpener.
Using smooth paper helps with clean lines and quick shading. Practicing with your chosen materials in timed sessions beforehand builds muscle memory and reduces anxiety.
One trick I use is layering light pencil strokes before committing to darker lines, so I can adjust shapes easily. This approach balances precision with flexibility, ideal for high-pressure environments.
Hybrid Techniques: Combining Analog and Digital
Some artists benefit from blending traditional and digital methods. For example, sketching initial ideas on paper and then scanning them for digital refinement can combine the best of both worlds.
I experimented with this hybrid workflow and found it particularly helpful when I wanted the tactile feel of pencil but needed the polish of digital coloring.
It requires some prep but can boost both creativity and efficiency. If your exam allows, consider practicing this method to expand your toolkit and adapt to unexpected requirements.
Key Principles for Final Presentation
Clean Linework and Polished Rendering
Your final presentation is what leaves a lasting impression on the examiner. I always dedicate the last phase of my exam time to cleaning up lines and adding polished rendering where appropriate.
Crisp linework not only clarifies your design but also shows professionalism and attention to detail. For rendering, subtle shading and highlights can add volume and depth without overcomplicating the image.
In my experience, this finishing touch elevates your character from a simple sketch to a fully realized design.
Clear Annotations and Character Notes
Including brief notes or annotations alongside your design can demonstrate your thought process and design intentions. I make sure to jot down key personality traits, backstory elements, or design choices that might not be obvious visually.
This transparency helps examiners understand your concept and gives your work extra credibility. Even a few well-placed notes can make a difference, especially when competing designs are visually similar.
Effective Use of Layout and Spacing
How you arrange your character and supporting elements on the page affects readability and impact. I learned to leave enough breathing room around the figure and avoid cluttering the composition.
Using a clean, balanced layout guides the viewer’s eye naturally and highlights the most important parts of your design. This attention to presentation signals professionalism and can subtly boost your scores.
Practicing layout design as part of your exam prep builds confidence in delivering a complete, polished package.
| Aspect | Key Tips | Common Pitfalls | Exam Impact |
|---|---|---|---|
| Anatomy | Master proportions, use gesture drawing, balance realism and stylization | Ignoring basic proportions, stiff poses, over-exaggeration | Improves believability and dynamic appeal, crucial for high marks |
| Personality | Use visual cues, color psychology, expressive faces | Generic designs, random colors, flat expressions | Creates memorable, relatable characters, boosts emotional connection |
| Workflow | Plan first, layer work, manage time with mini-deadlines | Rushing, skipping planning, poor time allocation | Enhances efficiency, reduces mistakes, ensures complete submissions |
| Storytelling | Include props, use line weight, balance detail | Over-detailing, ignoring supporting elements | Adds depth and readability, impresses examiners with concept clarity |
| Tools & Medium | Learn shortcuts, prepare materials, try hybrid methods | Unfamiliarity with tools, poor material choices | Speeds up process, improves quality and adaptability |
| Presentation | Clean lines, clear notes, balanced layout | Messy finish, lack of explanation, cluttered composition | Leaves strong final impression, signals professionalism |
Conclusion
Building strong character designs under exam conditions demands a blend of solid anatomy knowledge, expressive storytelling, and efficient workflow habits. From mastering proportions to thoughtful presentation, each step contributes to a memorable and professional final piece. With consistent practice and strategic planning, you can confidently create characters that not only meet but exceed exam expectations.
Useful Tips to Keep in Mind
1. Always start with a clear plan before diving into your drawing to save time and reduce errors.
2. Use gesture drawing to bring energy and life to your characters, avoiding stiff poses.
3. Choose colors intentionally to reinforce the character’s mood and personality.
4. Balance detail and simplicity to maintain clarity without overwhelming the viewer.
5. Familiarize yourself with your tools—whether digital, traditional, or hybrid—to maximize efficiency and quality.
Essential Takeaways
Focus on mastering the fundamentals of anatomy and proportion while adding personality through visual cues and color. Efficient time management and layered workflows are key to staying organized and polished under pressure. Don’t forget that props, line work, and thoughtful presentation can elevate your design and leave a lasting impression. Practicing these core principles will prepare you to tackle character design exams with confidence and professionalism.
Frequently Asked Questions (FAQ) 📖
Q: How can I effectively balance creativity and technical accuracy during a timed character design exam?
A: Balancing creativity with technical precision under time constraints comes down to having a clear, practiced workflow. Start by quickly brainstorming a few strong concepts, then choose one that feels both unique and manageable.
Focus on fundamental anatomy first to ensure your character looks believable, then add personality through distinctive silhouettes, poses, or expressions.
I found that setting mini-timers for each stage—rough sketch, refining anatomy, adding details—helps keep me on track without sacrificing originality.
Practicing this flow before the exam makes it feel more natural and less stressful.
Q: What are the most important anatomy principles to focus on for character design exams?
A: In my experience, nailing the basic proportions and joint placements is crucial. Understanding the skeletal structure helps you avoid awkward poses and ensures your character moves realistically.
Pay attention to the head-to-body ratio, limb lengths, and how muscles wrap around bones. You don’t have to render every muscle detail, but knowing where major muscle groups lie gives your character volume and believability.
Also, remember that stylization is okay—just keep the anatomy consistent within your chosen style to maintain credibility.
Q: How can I express a character’s unique personality visually in a limited time?
A: Personality shines through pose, expression, and costume choices more than intricate details, especially when time is tight. Use exaggerated gestures or dynamic stances to communicate traits like confidence, shyness, or energy.
Facial expressions should be clear and readable; sometimes a simple raised eyebrow or a smirk says more than a complicated face. Clothing and accessories that hint at their background or role add depth without needing long explanations.
When I focus on these elements early, it helps the character feel alive and memorable even in a short exam setting.